How to Fix an Asus UX31
Ultrabook That Won’t Turn on
- Comments: 0
- Written on: April 5th, 2013
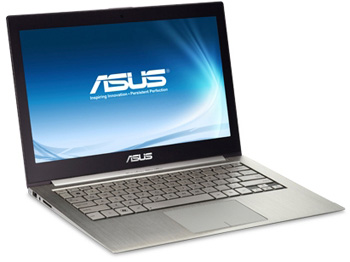 As technology gets smaller and thinner, there is a serious temptation by manufacturers to make computers more and more difficult to repair. For example, yesterday I was computing away on my couch with my Asus UX31A Ultrabook until it just quit suddenly and powered off.
The unit is still under the manufacturer warranty, but Asus is a stickler about keeping paperwork like purchase receipts. I own a computer repair company and we usually archive these invoices for customers, but I bought this one on my own and I am terrible with paperwork. I search for about 30 minutes for my purchase receipt before I gave up and took matters into my own hands.
Problem Description:
There are several reports on the web about these technological marvels just up and quitting. They are amazing when the work but it is beyond frustrating when they just quit for no reason. When mine quit I assumed my battery had died, so I grabbed grabbed my AC adapter and hooked it up. Nothing.
Pressing the power button got no response at all. To add insult to injury, after about five minutes the light on the AC adapter indicated the unit had a fully charged battery.
Pressing and holding the power button did nothing. This unit does not have a manual “pin prick” button to reset the system.
Elsewhere online the problem could be you get a power light and the Asus unit will not boot. Same problem solved here.
Problem Solution:
Online there is a lot of worry and gnashing of teeth over fears that opening your Asus UX31 will void your warranty. While it is true if you go stabbing around with a screwdriver and destroy the thing your warranty will be void. Also keep in mind if you elect to utilize your warranty and you have the proper paperwork you will probably be without your laptop for anywhere between a week and a month.
Instead you need to grab a small TORX screwdriver set. Asus didn’t use regular phillips head screws in the base of the unit, so a special screwdriver is needed. Don’t try to make the wrong tool for the job work. You can buy a set of TORX bits and a screwdriver on Amazon for about $10. Get the right tools for the job.
STEP 1: Remove the screws from the base of your Ultrabook. This is pretty straight forward stuff, and if I would have been thinking I would have snapped pictures while I had mine apart. Don’t worry though, you are just a few screws and a plug away from victory.
There are 10 TORX screws holding the back plate on the Ultrabook. All of them are the same size except two. The two screws in the center of the unit near the screen hinge are longer. Make sure these two screws get in the correct holes on reassembly. The rest are interchangeable. Remove the back plate to expose the soft underbelly of your rebellious Ultrabook.
STEP 2: Unplug the batter from the main board. You will see a large black mass secured by three screws. This is your Ultrabook’s battery. No need to unscrew it form the unit. Leave it as it is and focus instead on disconnecting it from the main board.
Toward the upper left corner of the battery you will notice a small row of multicolored wires that terminate in a black plastic block on the bottom left corner of the main board. You need to disconnect this form the main board CAREFULLY!
Asus was kind enough to place a black plastic loop around the wires (not the harness). From looking it appears you could just pull the loop and get the plug out. DON’T DO IT. The loop is there for assembly easy – not disassembly. If you pull the loop you could tear the wires from the harness, rendering your battery useless.
Instead, use a very small screwdriver to pop each edge of the the black hard plastic harness upward. The plug lifts straight up. No twisting, no flipping. It comes straight up. It will resist. Mine took minor upward pressure on a jewelers screwdriver at each corner to GENTLY pop it up and free from the main board.
STEP 3: Plug in your AC Adapter. Once you have the battery unplugged, you have effectively removed all power from the unit (a power cycle procedure in normal circumstances).
Plug in your AC Adapter, open the unit and attempt to turn it on. It should power up! If it does not, this article will not solve your issue because it lies either in the AC adapter, a broken DC jack, or the unit’s main board its self.
Once you have verified the unit is passing its POST test and you get video on the screen, unplug it.
STEP 4: Reassemble the Unit. Follow the previous steps in reverse. Plug in the battery again (a straight downward pressure). Replace the back plate and the screws using your TORX screwdriver. REMEMBER!! There are two longer screws. These go near the hinge in the center two holes. The rest of the screws are interchangeable.
Now hook up the AC adapter again and confirm the unit works properly.
STEP 5: Update the BIOS. This happened because something ASUS made isn’t working right. When that happens and it is discovered after the fact, manufacturers issue software updates to correct the problem called BIOS updates. My UX31A unit had 4 BIOS revisions newer than the original BIOS installed on it.
Visit support.asus.com and check for a newer BIOS than the one you are running. I am not going to explain this part because it is tricky and you can brick your unit. Bricking an Ultrabook that won’t boot is one thing, but now that your does, I don’t want to be responsible for bricking it 😉
Asus provides BIOS update instructions on the website if you are so inclined.
Leave a comment below with questions or to let me know if this worked for your unit like it did for mine!
- If you liked this post, subscribe to my feed!
- Comments: 0